|
 |
1.
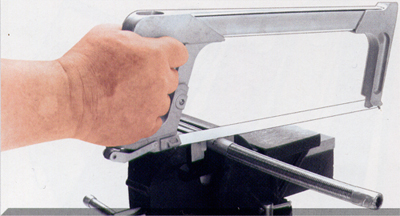
Cutting the Fragola Performance Systems Series 3000
stainless braided hose is easy. Wrap the hose with "Gray" or
masking tape at the length desired. Hose may be cut with a
hack saw, if you have a 32-teeth-per-inch blade, otherwise a
Beverly Shear, radiac, or chop saw will work fine. You want
to keep the braids from fraying. After the cut, carefully
remove the tape and trim from the frayed ends if necessary.
2. Using FPS aluminum vice jaws will help protect the hose
from scratching during the next steps. If there is a concern
about scratching, the hose end may be wrapped with tape for
protection. Place the red socket in a vise, and insert the
hose through the smooth end until the hose lines up with the
bottom of the threads inside the socket. |
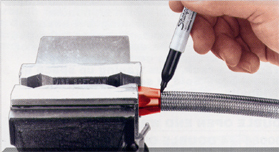 |
3. It is
important to mark the outside of the hose at the end of the
socket. This will show you if the hose has "pushed out" of
the socket during assembly, and if so, will leak when used. |
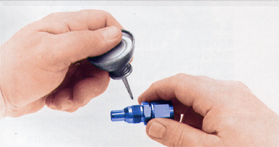 |
4. It
is very important to lubricate the inside of the hose/socket
assembly, and the outside of the cutter threads with any
assembly lube, anti-seize compound, or 30 wt. Motor Oil.
W/D-40 is not recommended! |
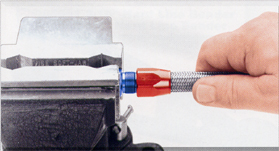 |
5. Hold
the hose and not the socket, start the hose on the nipple of
the hose end, with a gentle motion. Continue pushing on the
hose until the threads can be engaged. Some sizes may
require the use of some force to engage the threads at this
point. |
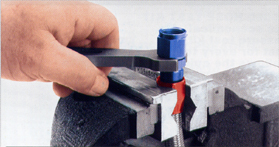 |
6. It
doesn't matter which portion (the socket or the nipple) is
secure in the vise. Using a suitable wrench tighten the
socket threads onto the cutter. An adjustable "Crescent"
type wrench is not recommended, as it may slip and damage
the outside of the hose end.
7. Tighten until the socket is within .060-.080" of
bottoming out. Recheck your mark, and if it is within 1/16"
of the socket your are OK. If not, disassemble the hose end,
re-cut the hose and start all over again.
8. Clean the inside of the hose assembly with the clean
solvent. Blow out residue with a compressed air. It is
strongly recommended that you test the hose assembly for
leakage before putting it into service. Be sure to lubricate
the "B-nut" threads before installing on an adapter. |
|
P.T.F.E. Hose Assembly |
 |
You may cut the hose in the same method as our 3000 series hose. With the hose cut to the desired length, you
must first slide the "socket" onto the hose.
Next you must open up the braiding in order for the
"olive" to slide over the PTFE liner. Our #900065 PTFE Braid
Spreader works well in this application. The
braid must be spread sufficiently so that small shoulder
inside the "olive" rests against the cut end of the PTFE
liner.
If you used our #900065 Braid Spreader, the nipple end
will have already resized the PTFE liner, which may be
squashed from the cutting operation. If not, you must insert
something in the end of the PTFE liner to bring it back to a
round shape (and ice pick works well for this operation)
|
 |
|
Push-Lite Hose Assembly |
 |
Soften
the end of the hose slightly in boiling water. Then oil the
hose end nipple.
Clamp the hose end in a vise using our #900061 Aluminum Vice
Jaws, and in one motion push the hose over the barb. The fit
is tight on purpose, as it is the only method of hose
retention. |
|
Power Steering Hose
Assembly |
 |
You may cut the hose in the same manner as our Series 3000
Race Hose, but it is not necessary to tape the end prior to
cutting.
Install the "socket" over the cut end of the hose. Some
twisting may be required to get the "socket" to the desired
position with the hose seated against the bottom of the
socket.Clamp the hose and socket in a vise using our
#900061 Vice Jaws. Oil the tapered nipple with some form of
motor oil/assembly lube, and screw the fitting all of the
way in, until the socket seats on the fitting shoulder. Blow
out with compressed air to remove any assembly residue. |
 |
 |
